"If you're having trouble connecting a device to PLC IDE"
Guide and Tutorial | "If you're having trouble connecting a device to PLC IDE"
title: "If you're having trouble connecting a device to PLC IDE"
Check this first
-
If you haven't done so, start by checking the Arduino PLC IDE Setup and Board's License Activation tutorial.
-
Ensure you've installed the latest version of the Arduino PLC IDE software.
-
Ensure that you have full administrative privileges when running PLC IDE.
-
Ensure you use a USB cable that supports data transfer.
-
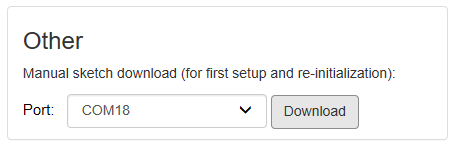
When downloading the runtime, or connecting to the device, ensure you're targeting the correct port.
-
When opening a project created with an earlier version of the PLC IDE, some issues may occur. Try creating a new project (File > New Project) to see if this resolves the issue.
-
You need valid license to download the code to the device:
-
Licenses for Portenta Machine Control are available in the store. Instructions for license activation are available here.
-
Arduino Opta is a pre-licensed product, just follow the activation instructions.
-
About port selection
It's important to understand which ports to target when configuring your PLC device connection.
How to identify which ports belong to your device
If other devices connected to your computer have open serial ports, you need to determine which ports belong to your PLC device:
-
Disconnect your PLC device from your computer.
-
Select Project > Refresh current target to refresh the list of ports.
-
Open the runtime sketch download port menu, and take note of the available ports.
-
Connect your PLC device.
-
Again, select Project > Refresh current target to refresh the list of ports.
-
Open the runtime sketch download port menu, and take note of any new ports.
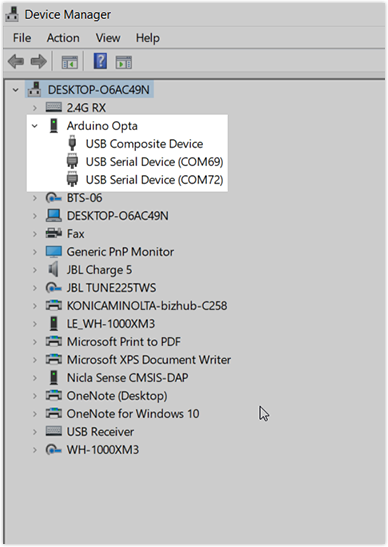
You can also use the Device Manger in Windows:
-
Open the Device Manager.
-
Select View > Devices by container.
-
Look for an Arduino Opta or Portenta H7 MCUboot container.
-
Click to expand the container:
-
Look for USB Serial Device items, and note the port names.
Solutions for specific problems
If the "On-Line > Set up communications" and "On-line > Connect" options are disabled
These options are only available when a project is open. Select File > New Project to create a new project.
Error: “Unable to start the communication”
When choosing On-line > Set up communications you may get this error message:
Unable to start the communication
Choose 'On-line / Set up communication' to configure it
Resolve the issue by selecting On-line > Set up communication and checking the settings. See Connect to the Device for help.
Error: Cannot download sketch file (error code: 1)
When downloading the runtime sketch, you may get this error:
Cannot download sketch file (error code: 1)Follow these steps:
- Double-tap the reset button on the device to set it to bootloader mode, and try downloading the sketch again.
- Close any applications that may be blocking the port, such as the serial monitor in Arduino IDE.
- Check the port selection.
If nothing happens when downloading the runtime sketch
- Ensure you've installed the latest version of the Arduino PLC IDE software from the Arduino Software page.
- Restart PLC IDE.
Error: "(DownloadSketch) Can not download sketch: COM port must be used!"
When downloading the runtime sketch, this error may appear in the console:
(DownloadSketch) Can not download sketch: COM port must be used!It can occur if the wrong port is selected in the manual sketch download widget. If you're unsure which port to use, see About ports in PLC IDE.