Handleidingen en tutorials |
Overview
In this tutorial, we will show how to configure the Finder Opta to make it act
as a BLE Peripheral, to which a Central can connect to pilot the LEDs of the
device. In particular, we will configure a Service containing a read and write
Characteristic, so that a Central can read and write hexadecimal values
corresponding to different LEDs states.
Goals
- Learn how to create a BLE Service and Characteristic on the Finder Opta.
- Learn how to read data written by a Central inside the Characteristic of the
Finder Opta.
Required Hardware and Software
Hardware Requirements
- PLC Finder Opta (x1).
- Cavo USB-C® (x1).
Software Requirements
- Arduino IDE 1.8.10+, Arduino IDE
2.0+ or Arduino Web
Editor. - If you choose an offline Arduino IDE, you must install the
ArduinoBLE
library. You can install it using the Library Manager of the Arduino IDE. - Example code.
Finder Opta and BLE
Using the ArduinoBLE library, the Finder Opta can act as BLE Peripheral and
configure Services with one or more Characteristics in read and/or write mode.
When using this library the Finder Opta can also start advertising and wait for
a Central to connect and exchange commands.
Instructions
Setting up the Arduino IDE
This tutorial will need the latest version of the Arduino
IDE. If it is your first time setting up
the Finder Opta, check out the getting started
tutorial.
Make sure you install the latest version of the
ArduinoBLE
library, as it will be used for BLE communication with the Central.
For further details on how to manually install libraries refer to this
article.
Code Overview
The goal of the following example is to configure the Finder Opta as BLE
Peripheral, then to expose a read and write Characteristic that a Central can
write to, in order to turn on or off the LEDs of the Finder Opta. In
particular, we will configure a Service with a Characteristic in it and we will
start advertising, waiting for write by the Central which contain the
hexadecimal commands that pilot the LEDs.
Sketch setup
At the start of the sketch we declare the BLE Service and Characteristic with
their relative UUIDs. Additionally, the Characteristic will be configured in
read/write mode:
BLEService ledService("b4bf4c90-a3eb-413f-9698-cfaaa9a428cc");
BLEByteCharacteristic ledCharacteristic("b4bf4c91-a3eb-413f-9698-cfaaa9a428cc", BLERead | BLEWrite);
In the setup() function we will configure the advertised name of the device,
and then we will pair Service and Characteristic, also setting its initial
value; at the end of these operations we will start advertising. The code of
the function is shown below:
void setup()
{
    Serial.begin(9600);

    // Init the BLE service.
    if (BLE.begin() == 0)
    {
        while (1)
        {
        }
    }

    // Set local name and service UUID.
    BLE.setLocalName("Finder Opta");
    BLE.setAdvertisedService(ledService);

    // Add service and characeristic.
    ledService.addCharacteristic(ledCharacteristic);
    BLE.addService(ledService);

    // Set initial value.
    ledCharacteristic.writeValue(0x00);

    // Start advertising.
    BLE.advertise();
}
Main loop
The loop() function of this sketch listens for connections by the Central,
until one is actually connected: at that point, the Finder Opta will check if
something was written inside the ledCharacteristic, and in case it was it
will read the value to control the LEDs from number 0 to number 3. The code of
the main loop is attached below:
void loop()
{
    // Check if any central is available.
    BLEDevice central = BLE.central();
    if (central)
    {
        Serial.println("Central connected.");
        while (central.connected())
        {
            // If central wrote to characeristic.
            if (ledCharacteristic.written())
            {
                uint8_t state = ledCharacteristic.value();
                digitalWrite(LED_D0, state & 0x01);
                digitalWrite(LED_D1, (state & 0x02) >> 1);
                digitalWrite(LED_D2, (state & 0x04) >> 2);
                digitalWrite(LED_D3, (state & 0x08) >> 3);
            }
        }
        Serial.println("Central disconnected.");
    }
}
Note that the state of the n LED will depend on the value of the n bit in
the command written by the Central inside the ledCharacteristic: if the n
bit is set to 1 the n LED will be turned on, if the n bit is set to 0 the
n LED will be turned off. In the comments of the code we included a table
containing the mapping between hexadecimal code of the command and LEDs
behavior.
Interaction example
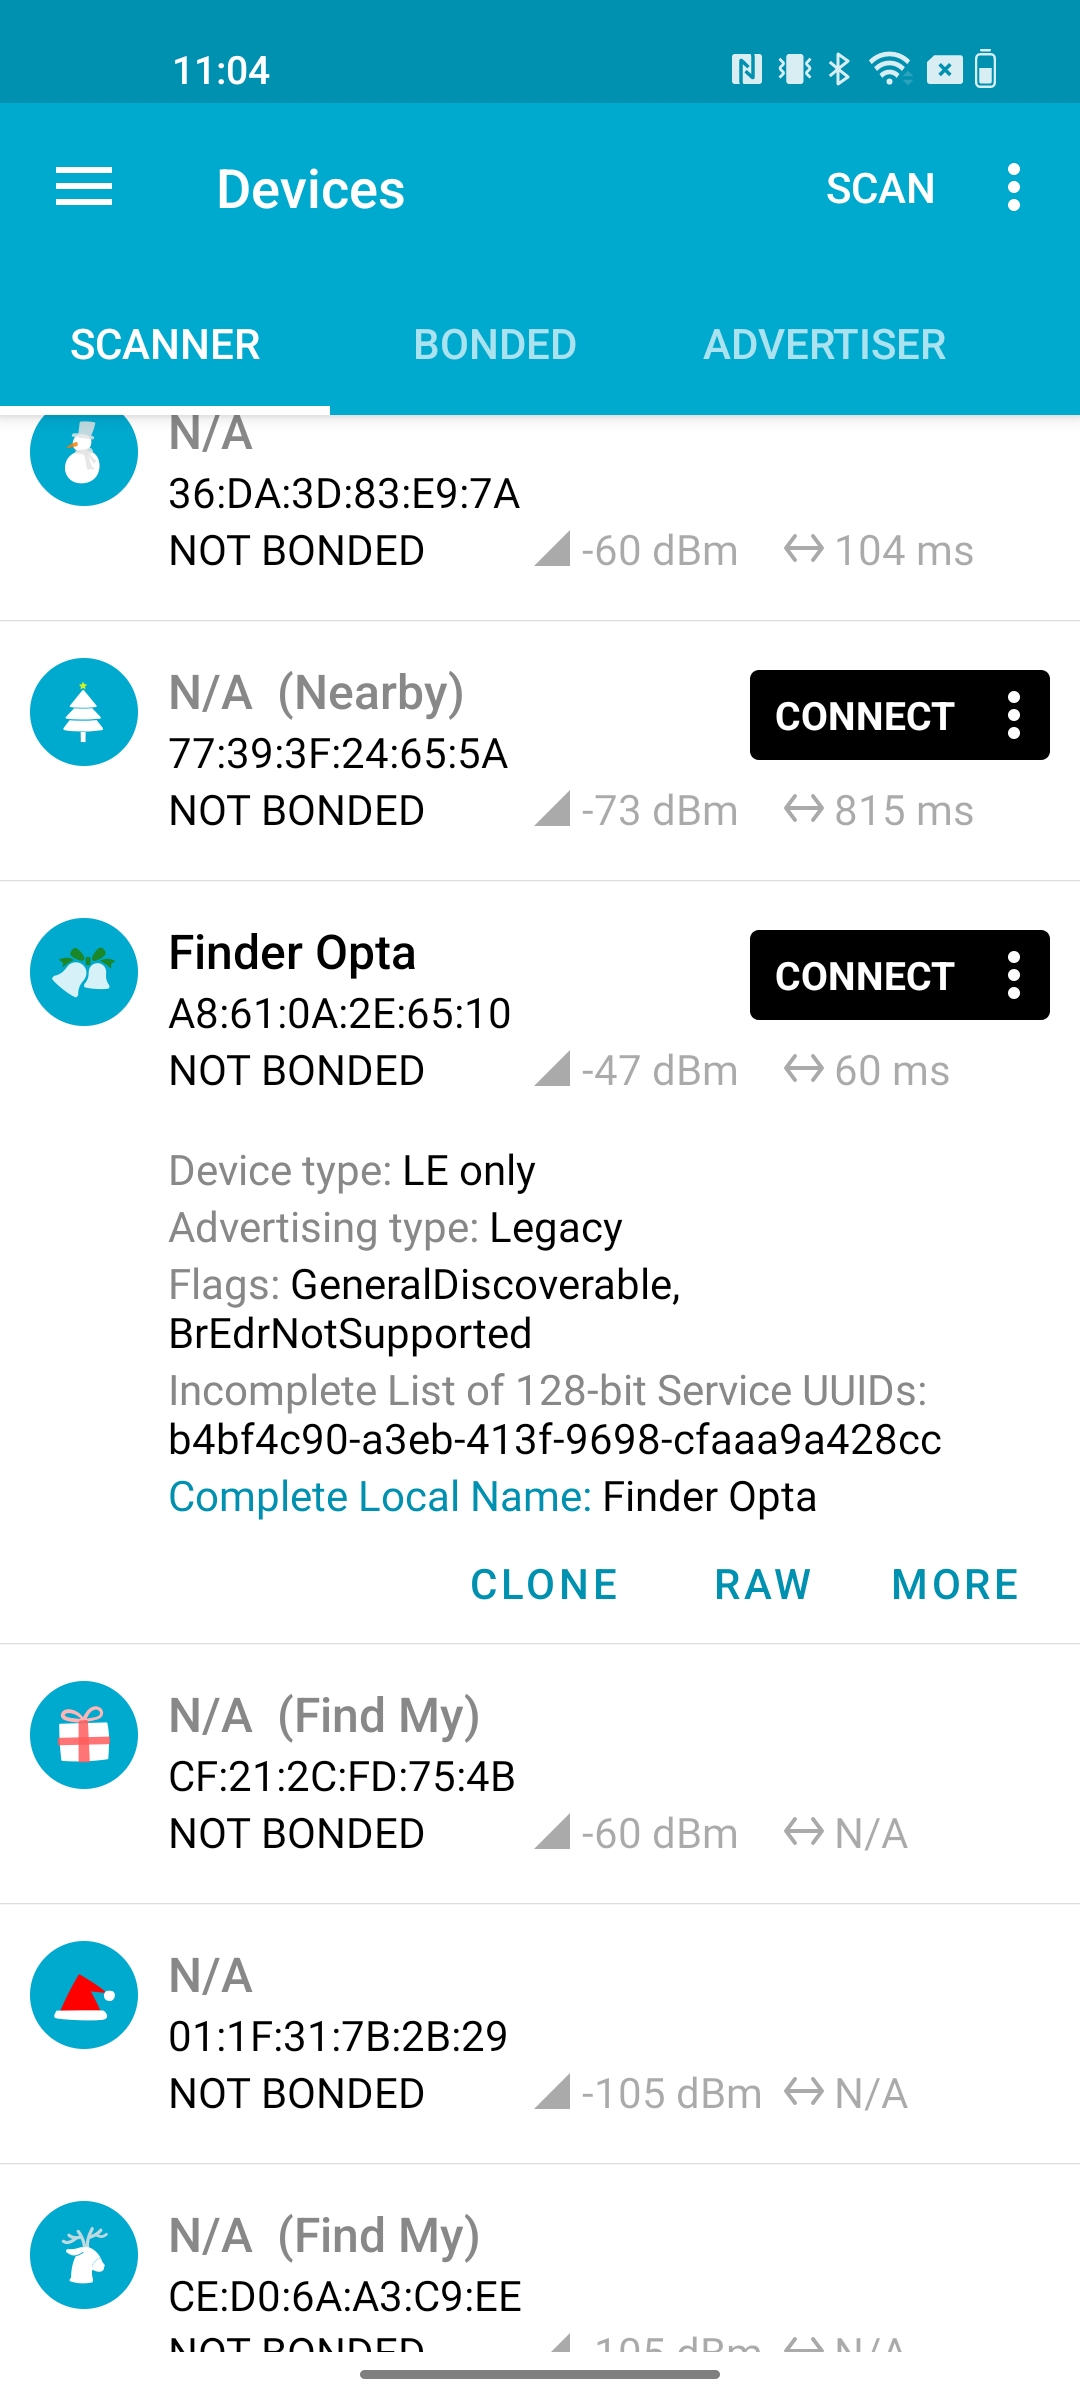
Once the sketch has been compiled and uploaded to the Finder Opta, we can use
the nRF
Connect
app to connect to the BLE Peripheral and write a command inside the
Characteristic. At the end of a scan, the Finder Opta will appear among the
available devices:
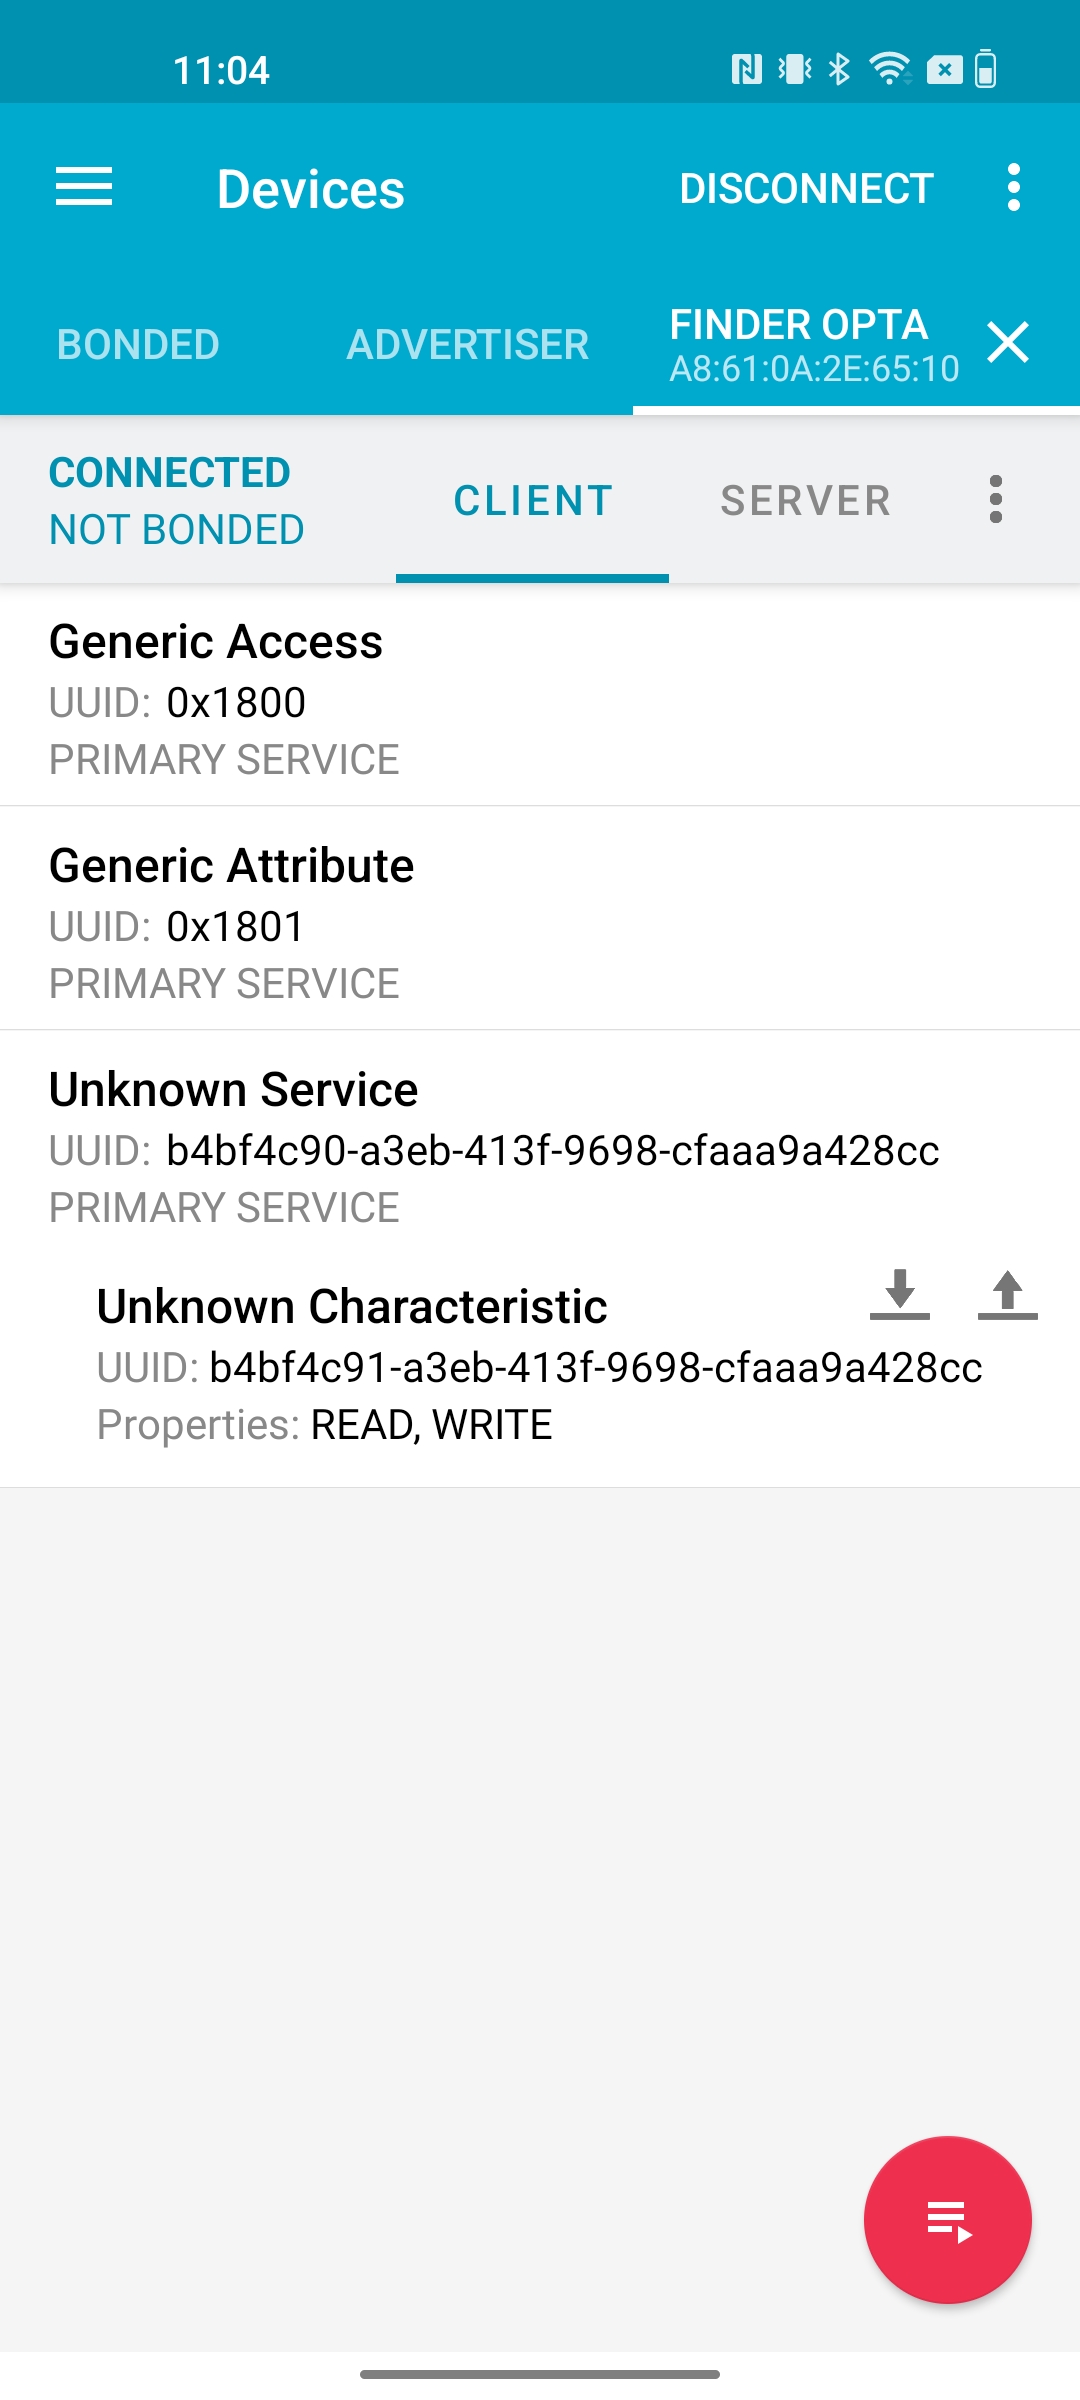
We then proceed by connecting to the device, after which we see a Service and a
Characteristic with UUIDs matching the ones assigned by the sketch:
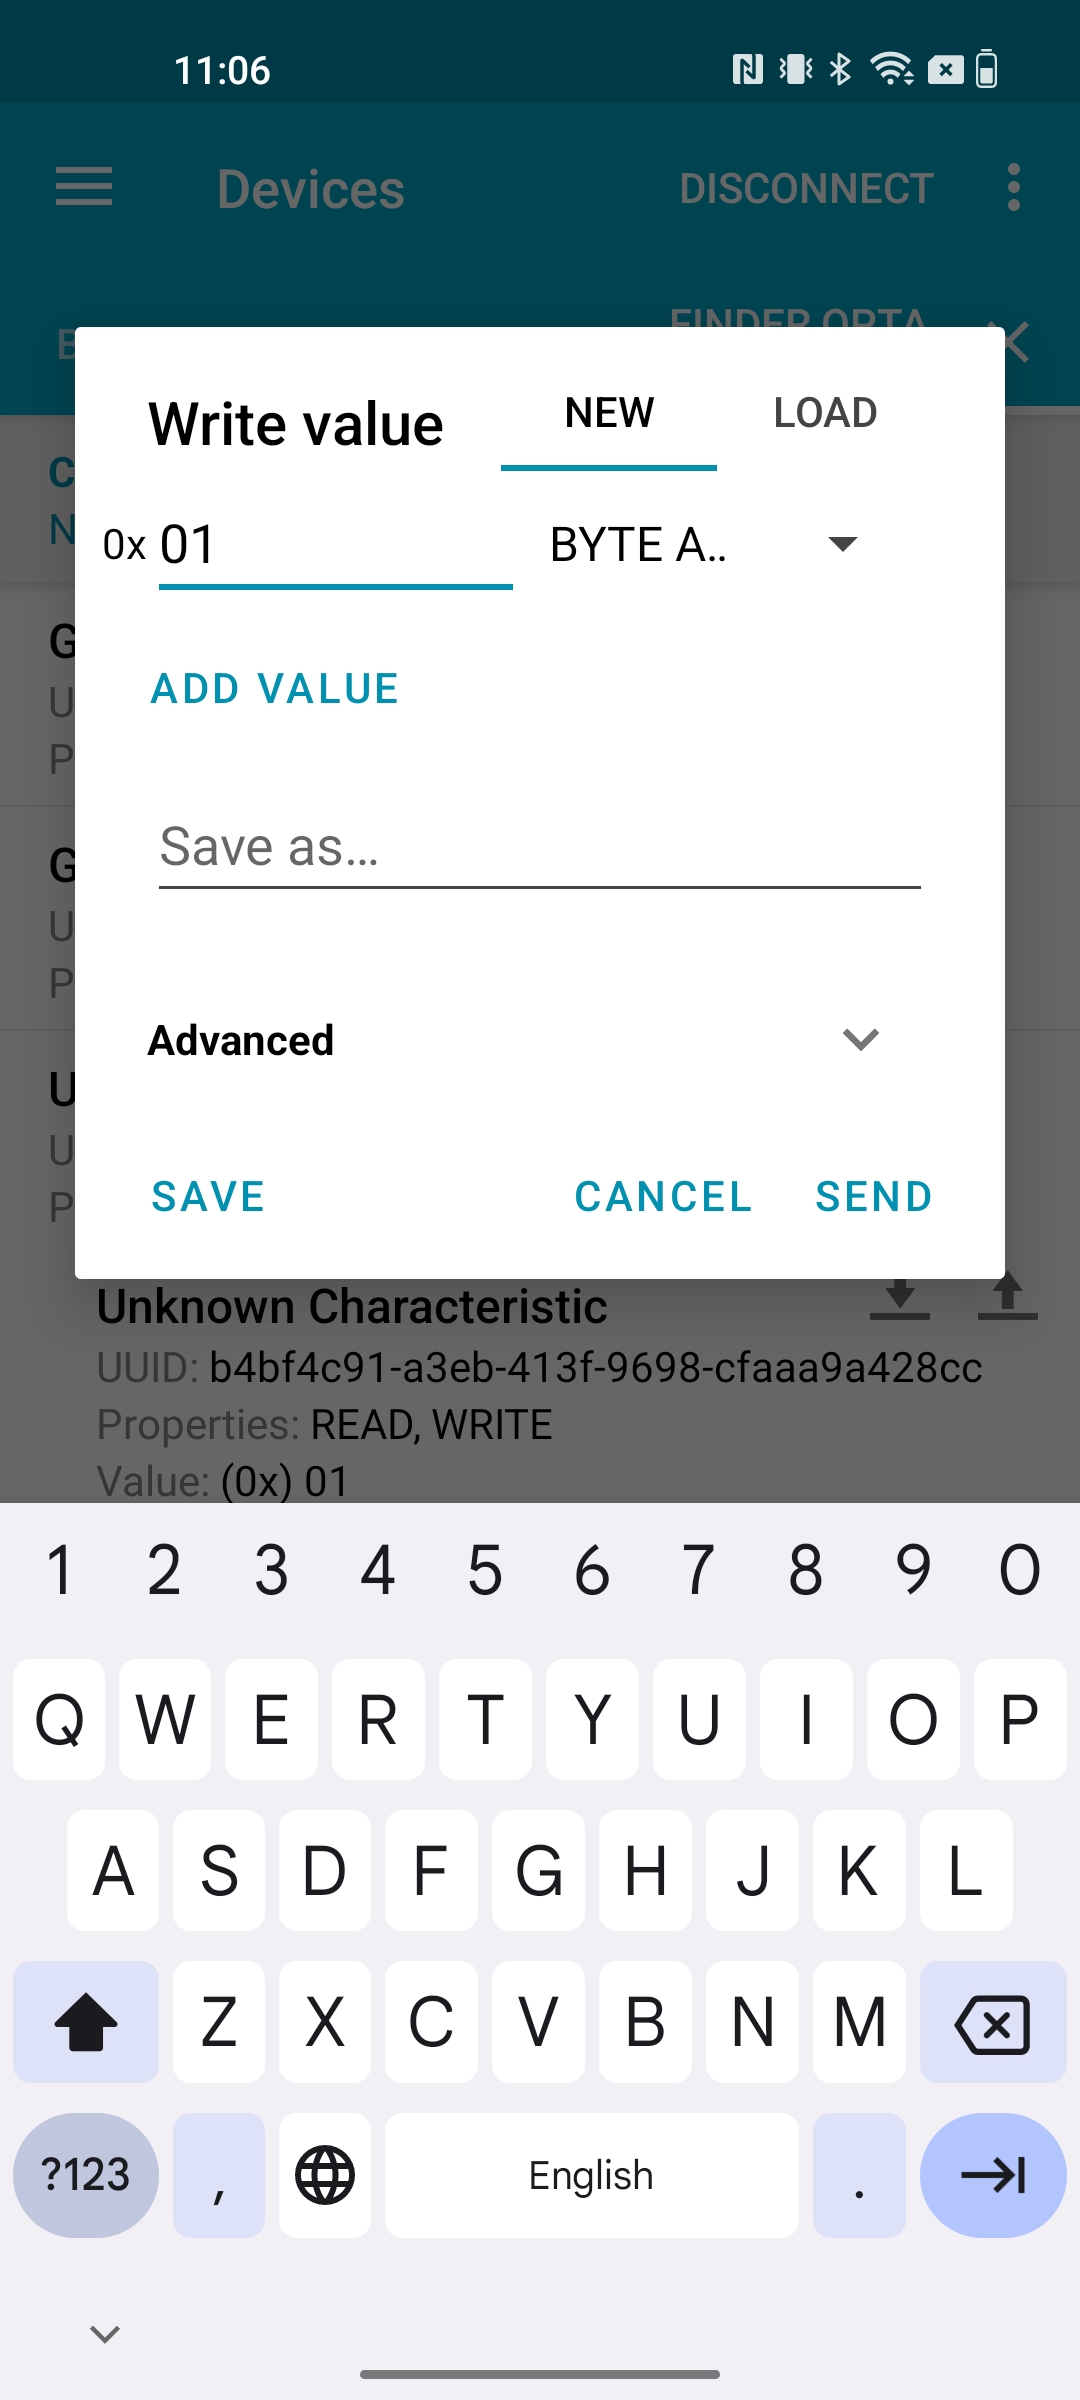
Let’s now click on the icon with the arrow pointing up in order to perform a
write. The screenshots show examples of how to turn on LED 0 and LED 3:

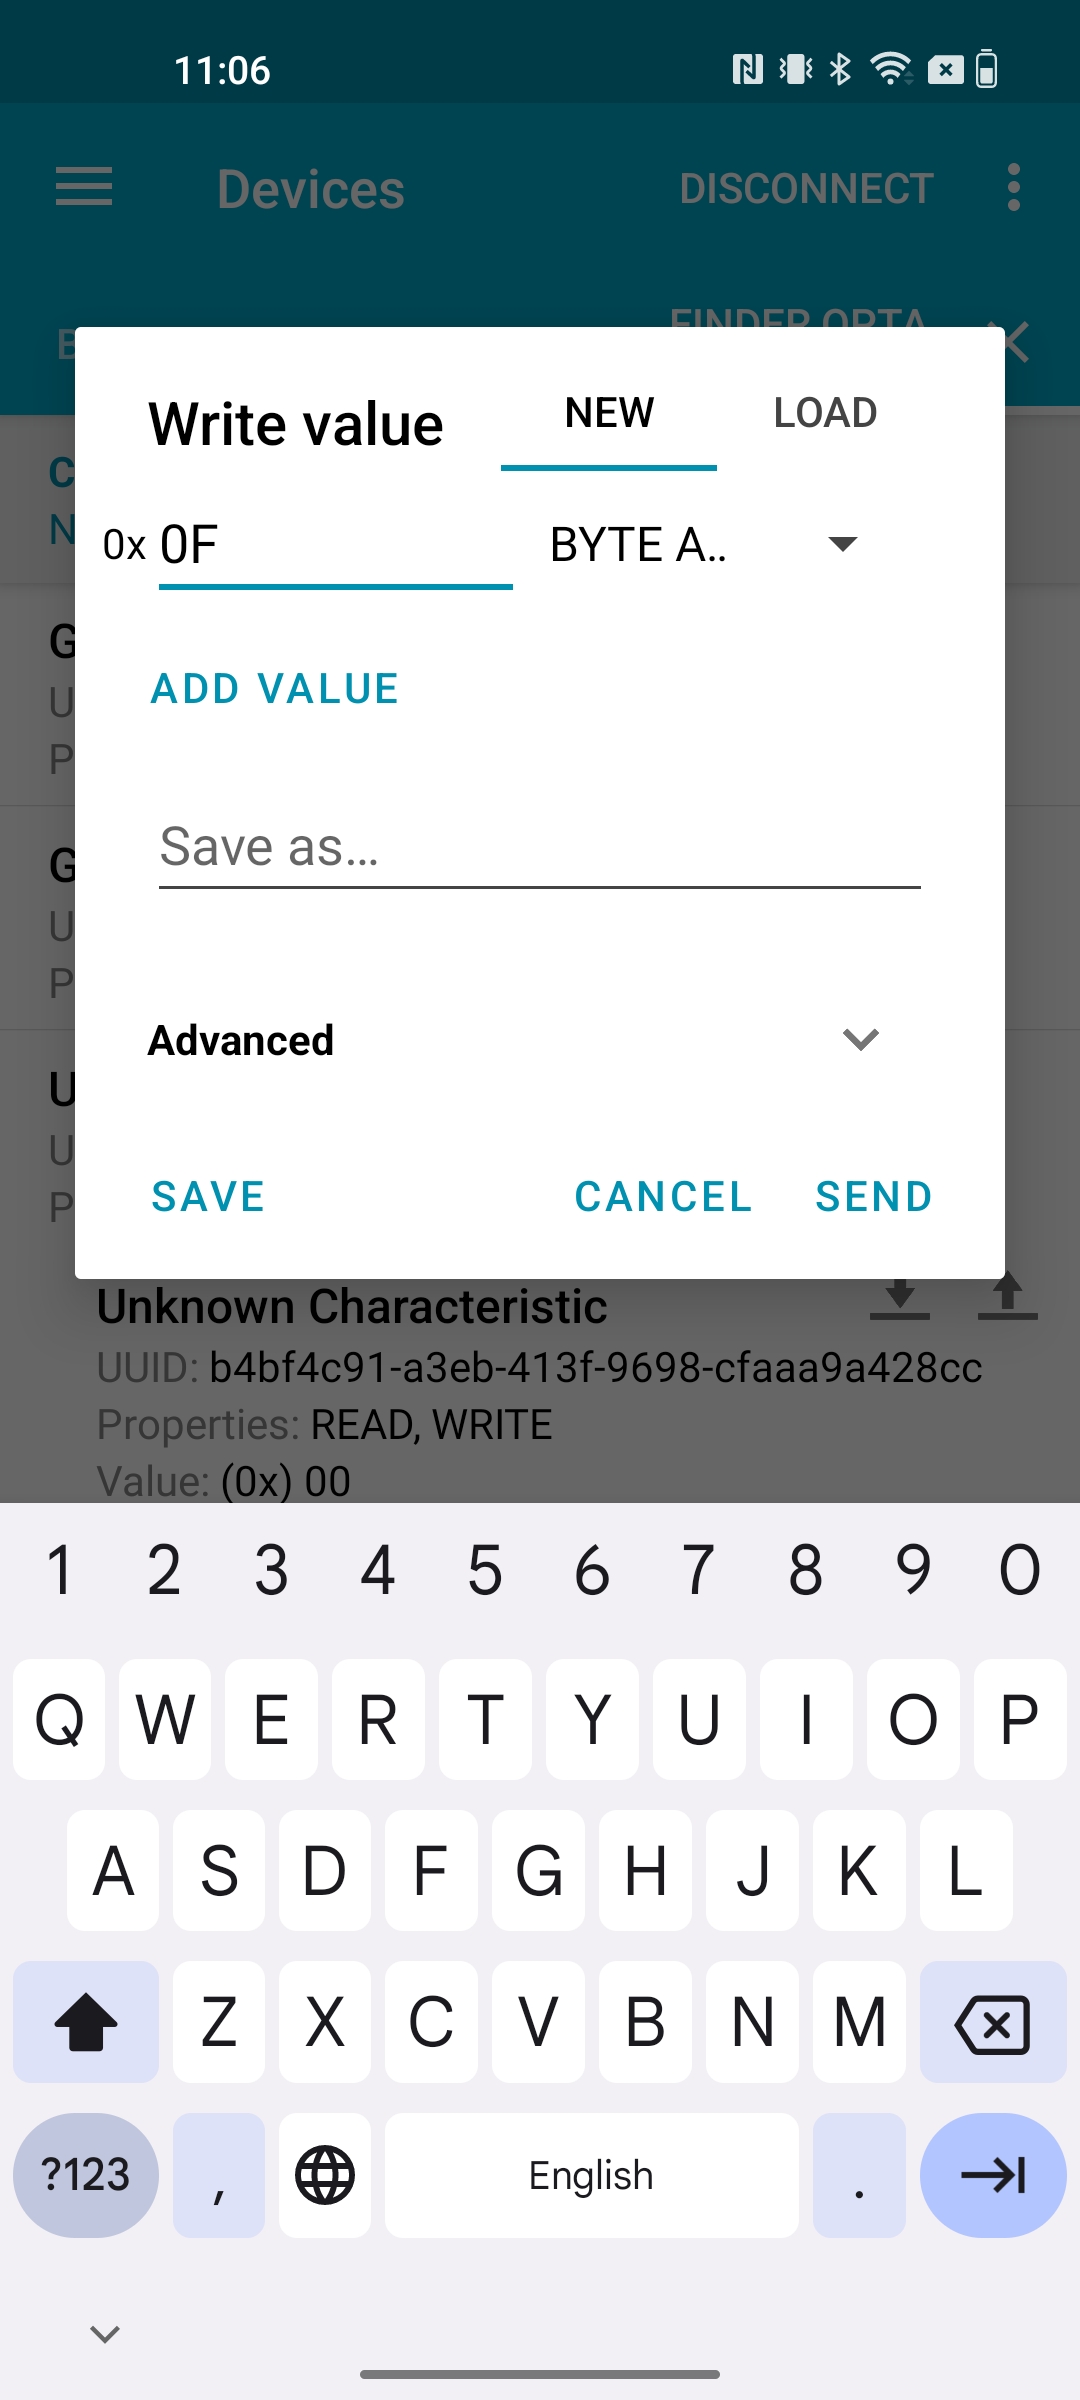
Finally, this last screenshot shows how to turn on all the LEDs of the Finder
Opta with a single command:
Conclusion
This tutorial shows how to configure the Finder Opta as BLE Peripheral, in
order to expose a Characteristic in which a Central can write an hexadecimal
command to pilot the state of the LEDs of the device.